


⭐⭐⭐⭐⭐ 4.9/5 from enthusiastic customers


 Spark R&D - Arc ST Splitboardbindung schwarz - Seitenansicht
only a few available
Sale
Save up to €150
Learn all about splitboard bindings
Splitboard binding systems have made significant progress in the last decade, becoming lighter, more efficient and easier to use. With the vast increase in the number of suppliers and models, there is now a very large selection, which can make choosing difficult. Here we explain what types of bindings there are, how they work and what you should look out for so that you can find a splitboard binding that works well for your needs .
When comparing splitboard bindings , you can see the differences between the individual models. This should give you a good feeling for which binding is right for you.
What is a splitboard binding?
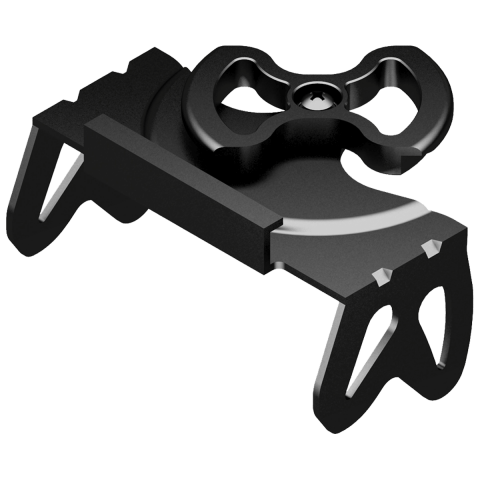
Since you have to earn the right to go downhill with a splitboard, the bindings must also be able to be used for going uphill. Instead of permanently attaching the bindings like on a normal snowboard, splitboards use adapters in which the binding can be mounted in either uphill or downhill mode. The adapters for going uphill are usually called touring brackets , and those for going downhill are called interfaces . On the touring brackets, only the front part of the binding is hooked onto an axle and can rotate around it so that you can walk with it.
The interface connects the bindings and board for downhill skiing. Depending on the manufacturer, there are different systems, such as “pucks” or “split disks”, which we will discuss below.
Depending on the boots used, bindings can be divided into two categories: hard boot and soft boot bindings. Since our main focus is on having fun on the descent, we have little experience with hard boot systems . These offer clear advantages on the ascent due to their higher lateral stiffness. So far, however, no system has convinced us on the descent, which is why we will concentrate on soft boot systems in the rest of the text.
How do splitboard bindings differ from normal snowboard bindings?
The main difference is the fastening mechanisms for walking and downhill modes described above. But there are a few additional features that are particularly useful when climbing:
- Focus on lightweight materials and straps
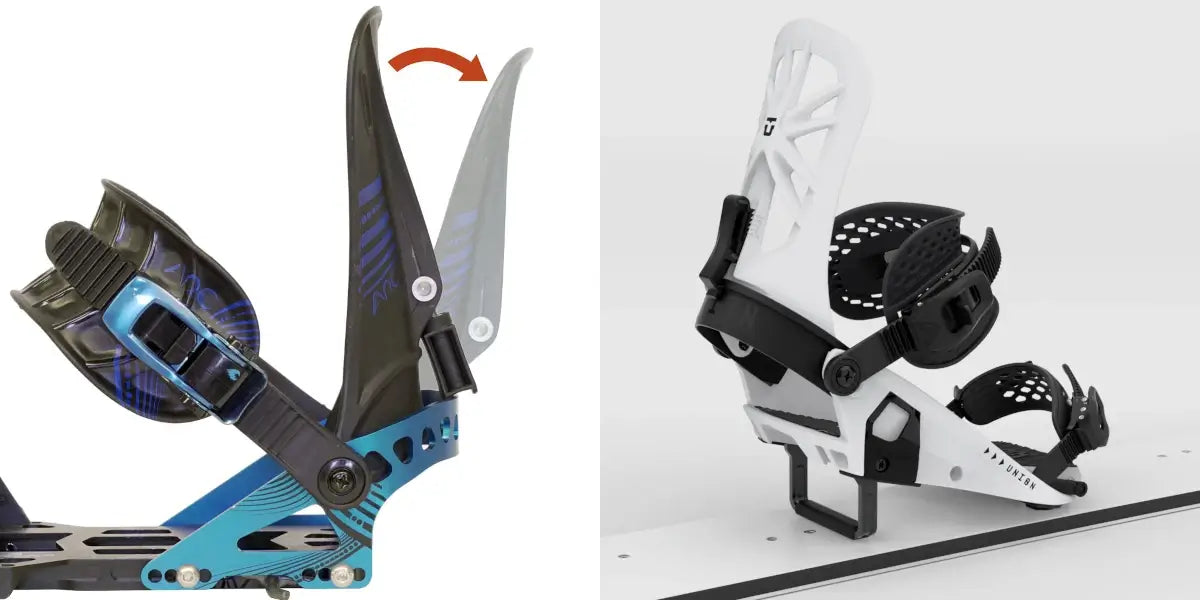
- Highbacks can be folded further back for climbing to allow for larger steps
- Climbing aids , small elevations under the heel, relieve the calf muscles in steep terrain
What is the difference between pin bindings and mechanical bindings?
Splitboard binding systems are often divided into two groups: pin bindings and “mechanical” bindings . Since there are big differences within both groups, this classification does not always make sense. But since you will come across it often, here is a short explanation.
Pin bindings use a pin to attach the binding. This is also the principle used in the first splitboard bindings, which is why pin bindings often have the reputation of being out of date. However, as these bindings have also been developed a lot, this cannot be generalized. The fact is that the conversion takes a little longer and requires a little more “tact” when wearing gloves than with most other systems. With a little practice, however, this can also be done quickly with pin bindings, so it makes no noticeable difference on the mountain. The big advantage of these bindings is that they do not have any moving parts, which makes them cheaper and more robust .
The other group are the mechanical bindings . Mechanical because the bindings are attached with moving parts . The conversion is quicker here than with the pin systems. Since the construction of the bindings is a bit more complex, they are a bit more expensive and require more maintenance.

What accessories are available for splitboard bindings and what do I need?
Interface & tour adapter:
As already mentioned, an interface and touring adapter are required for attachment in walking and downhill mode . These are already included with most bindings. However, with some systems the interface must be purchased separately, such as the pucks on the Spark bindings .
Attention: Interfaces and touring adapters from different manufacturers are (with a few exceptions) not interchangeable . Exceptions are, for example, pucks for Voilé and Spark systems, which are mutually compatible. The binding systems of large snowboard companies should also be mentioned. These are usually not in-house developments, but simply combine the mounting system and baseplate of the splitboard specialists with their own straps, highbacks and logos. Nitro and Burton splitboard bindings are based on the Spark system, K2 bindings are relabeled Voilé bindings and are therefore of course compatible with the respective interfaces and adapters.
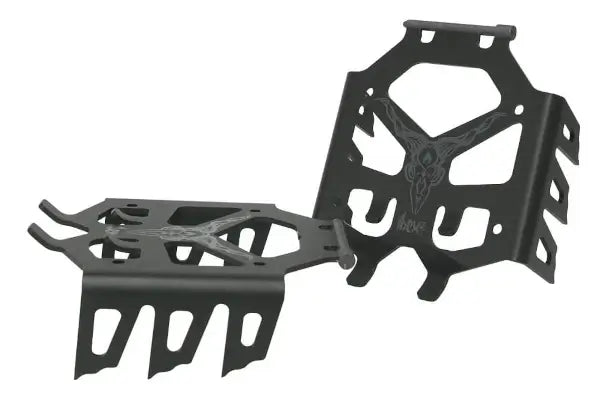
Crampons
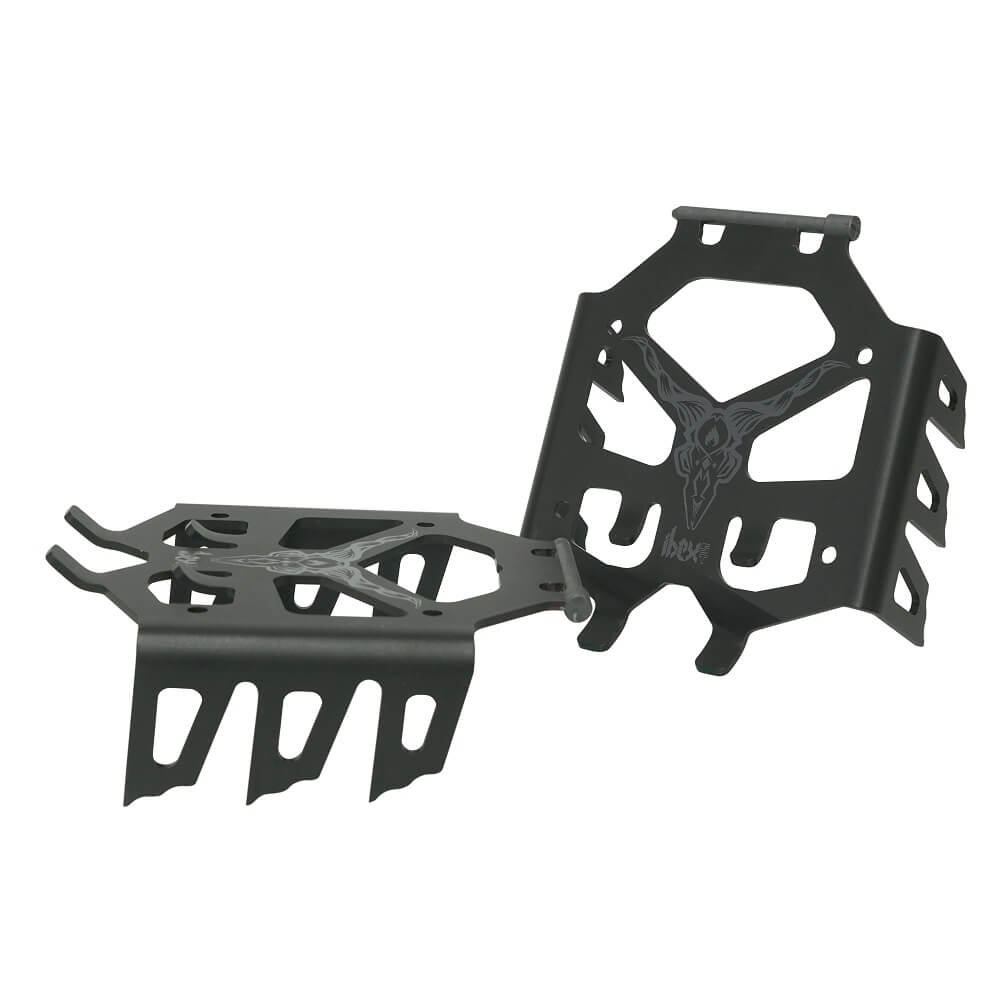
Crampons are used primarily in hard snow or on generally harder ascents. In these conditions, the steel edges or splitboard skins can reach their limits and do not always provide the necessary lateral or rear support. Crampons are metal claws that are attached to the binding. These claws can get caught in the hard snow and thus provide the necessary grip again.
Sooner or later, most splitboarders will need crampons, so we usually recommend getting them right at the start. Splitboard beginners in particular like to use them at the beginning, as they provide more lateral support and safety when traversing.
There are crampons in different widths. You should therefore make sure that the width of the crampons matches your board, otherwise the board could be damaged and the crampons will not function properly. In our shop you will always find a table for the crampons that shows you which width is needed for which board .
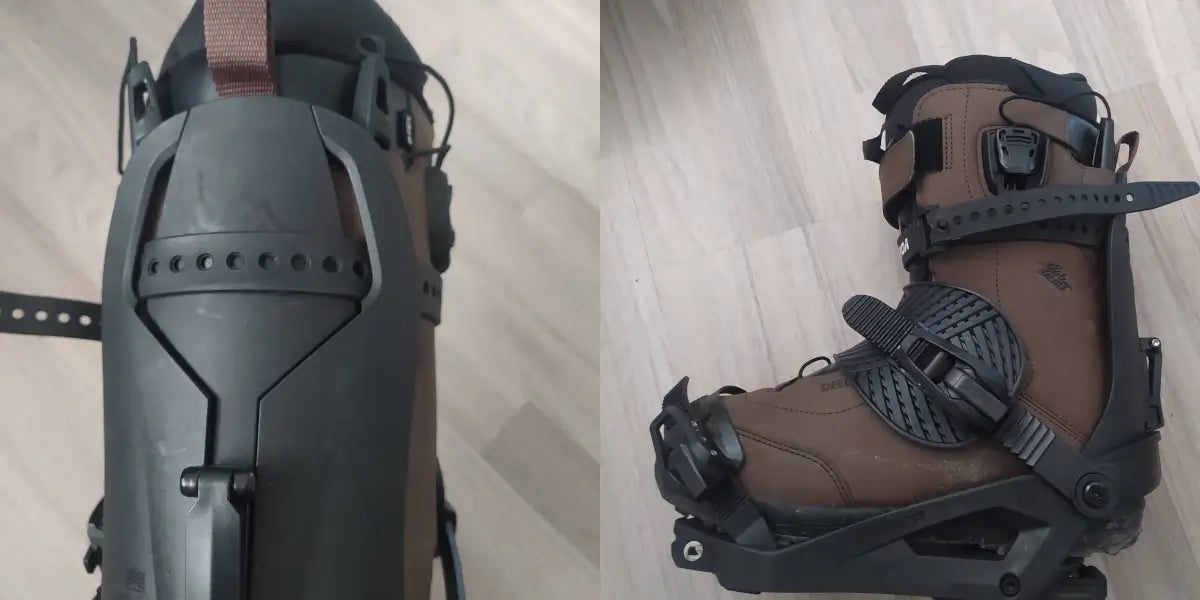
Fixation at the upper end of the highback for traverses
In order to obtain a better edge hold in traverses , there are some solutions on how to increase the lateral stiffness in climbing mode .
Spark, Voilé and Union bindings have recesses in the highback through which a strap or Velcro can be pulled to secure the boot to the highback. Karakoram has the Flex-Lock system . This always stays on the binding and can be activated by flipping a lever.
Heel fixations
With heel fixations, the bindings can be fixed to the heel in walking mode. This has the advantage that you can use them to ski short sections or move along flat paths in skating style. In our opinion, these fixations are not necessary and, in our experience, are rarely used. You quickly feel safe on short descents, even without previous telemark experience.
What should I pay attention to when buying a splitboard binding?
Before buying a splitboard binding, you should ask yourself the following questions:
- What size do you need? It is of course important that the binding fits your boat size, otherwise your toes could hit the ground when climbing or your boat could float in the binding. You will therefore always find a table with the size information on our product pages.
- What type of bindings do you prefer? More flexible freestyle bindings or stiffer freeride bindings?
- What do your tours look like ? Are they always long tours where you have to change bindings once at the top? Or do you have several short climbs and descents so that you have to change bindings more often? For long tours it doesn't really matter if you need 20 seconds longer to change bindings at the top, but if you have to change bindings more often it can be a bit annoying.
- What is your budget ? You should also think carefully about what accessories you need, such as crampons or solid board adapters.
- Do you want to use your binding on a normal board ? That would mean choosing a binding that already comes with solid adapters.
Frequently asked questions from our customers
-
As a board brand, we focus entirely on our boards and are not interested in offering the full range of accessories. However, since many customers are also looking for a suitable binding or a complete set, we still stock a few selected bindings in the shop.
We always test many different bindings throughout the winter. The bindings from Spark and Union have proven to be very good and reliable . In addition, they offer good value for money and years of experience with the good support of the two manufacturers have shown that they stand by their products if problems do arise.
-
Yes, this is possible with all common binding systems and has several advantages:
- One binding can be used for multiple boards .
- You save space for storage or transport . Simply remove the bindings and the boards can be placed directly on top of each other or right next to each other.
For this you need special adapters, which, depending on the system, have names like “Solid Disks” or “Solid Pucks”. These look very similar to the interface of the respective system, but are one-part instead of two-part and the screw spacing matches the hole spacing for normal snowboard inserts. There are no noticeable differences in handling compared to comparable, normal bindings.
Depending on the binding system, the Solid Adapters are already included in the scope of delivery of the binding (e.g. Union) or are available separately (e.g. Spark, Voilé, Karakoram).
-
Most manufacturers only offer unisex bindings . A few years ago there were separate women's models, but they only differed from the men's models in terms of color. Because the bindings have so many adjustment options, it is easy to adjust them perfectly to your boots.
-
As with a normal snowboard binding, there are several settings to perfectly adapt the binding to you and your boots, giving you an even better result:
- Modern splitboard bindings offer so many options for adjusting the binding to your boots. If you familiarize yourself with the settings and invest 10 minutes, you will benefit from them on the mountain. This includes positioning and aligning the highbacks or adjusting the length of the straps so that you don't get pressure points.
- Increase forward lean slightly for harder conditions to get better edge hold.
- Familiarize yourself with the splitboard functions of the binding at home . Practice switching from touring to downhill mode and back. Watch how to attach the crampons and how to unfold the climbing aids. All of this will help you so that you don't end up freezing your fingers off on the mountain because you don't get it right the first time.
- To start, position your bindings similarly to how you would position your regular board . Once you have developed a feel for the board, you can then start trying out different binding angles and spacing.
-
There are some splitboard boots that have features that are useful for touring. Since the number of these boots is constantly increasing, there are very different models. At one end of the spectrum there are boots that are intended for high alpine use and are reminiscent of mountaineering boots, at the other end there are boots that are quite close to normal freeride boots.
Our advice to splitboard beginners is to start with boots you already have and have broken in. After a few tours, you can then decide whether you need splitboard boots at all and, if so, which features are important to you.
-
Yes, with special adapters ( slider tracks ) you can also use “normal” snowboard bindings on splitboards… Can we recommend it? A clear no!
There are several reasons for this:
- The construction is quite difficult and error-prone
- difficult to adjust to obtain a good climbing performance
- Since the binding has to be screwed onto the adapter plate, you stand very high, which results in a somewhat strange driving behavior
- In addition to the slider tracks, you also need other parts such as pucks, touring brackets and climbing aids. The overall package is therefore hardly cheaper than a proper splitboard binding and the price-performance ratio is beyond belief.
-
Ask 5 splitboarders and you will probably hear 6 different opinions…
As with normal snowboard bindings, there are many differences and depending on your riding style, personal preferences or boots used, the rating can look very different.
We have created an overview of the splitboard bindings in our shop. This should help you to form your own opinion and find the right binding for you.


